Design workshops lay the foundation for the most critical steps in UX design – helping us understand the user, collaborate as a team, find patterns in data, prototype, and sketch ideas. In this article series, we explore four vital attributes of organizing successful remote workshops and share some secrets as to how we have adapted this iconic physical activity for the remote world. In the final installment of our series, Remote Workshop Facilitation, we share tips on how to improve workshop visibility and engagement among participants – starting with the invitation to the final workshop output.
Visibility throughout the design workshop process
Before the days of remote work, clients could attend a workshop in one of our offices, where they would see posters, Post-it notes, and colorful visual markers on the walls. The office was full of creative energy and stimulated imagination. The vibrant colors and visuals helped attendees measure their progress during the workshop. The visuals also enabled us, as facilitators, to showcase what was accomplished at the end of a session. Just as visual stimuli is critical in a physical space, it’s even more important to incorporate it in a remote environment. So, how can you simulate a creative environment online? Three simple ways.
The invitation
The starting point of a physical workshop is different than that of an online workshop. In a remote environment, the workshop actually begins from the moment you invite participants to join. The initial introduction presents a perfect opportunity to spark curiosity and begin telling the story – the journey, the experience, and the intended outcomes.
*Tip: Be fearless, and bring out all your tools. Tell a compelling story and create an invitation that’s hard to resist. Craft a communication that POPS!
The boards
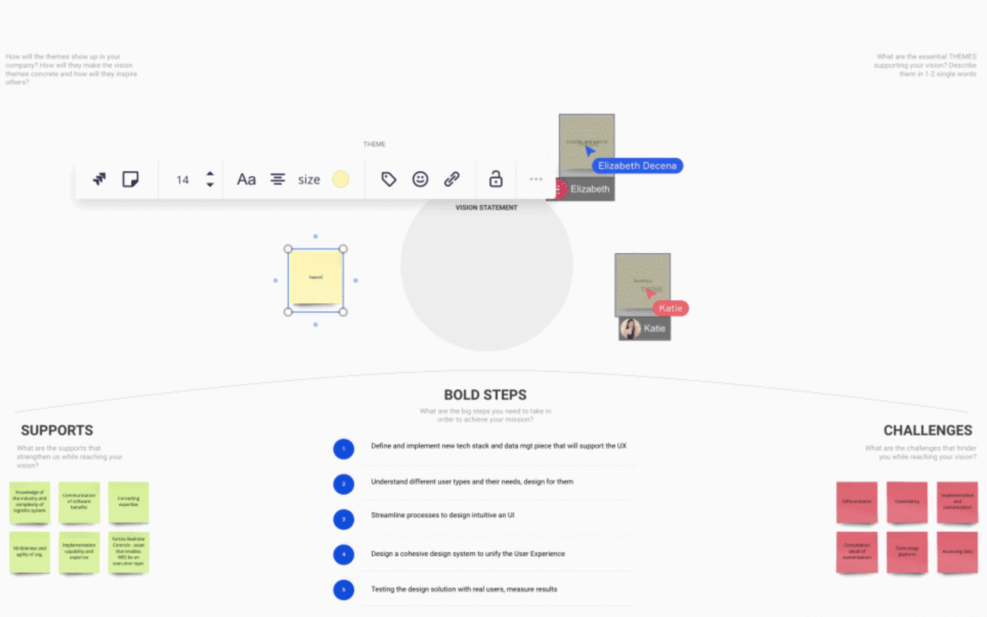
When setting up your workshop space, organization is crucial. We recommend that you use Miro frames to set up your virtual workboards. Assign each participant their own sticky note color and region of the board. Be sure that when you introduce moments of personal work, you give them a personal space on the board. For group converging, create extra-large boards and suggest participants use Post-it notes and dot-votes.
*Tip: When you have finished your board layouts, lock down all the content to prevent accidental moves or editing by your attendees.
The impact
Attendees will want to see how their input has impacted the overall project. In turn, they will want to see how workshop output will contribute to the overall product, service, or company need.
*Tip: Create a timeline during your workshop that illustrates project phases. Include the actual workshop in that timeline, and show participants how the workshop serves as a starting point for various activities. This will help attendees see their workshop contributions and provide a visual aid in measuring workshop output. (Show an example of the graph.)
Takeaways
Record your workshops. Use the recording as a tool to show your client the ideas, problems, and solutions stemming from the workshop. Documentation will help you accurately measure workshop outcomes. After completing the workshop, send the clients or participants an overview of the next steps and the project timeline.
Are you ready to engage with an experienced UI UX design agency? Let’s talk.
Contributor


